Matter is the name of the smart home standard that promises to bridge IOT devices and different home eco-systems. Amazon Alexa, Google Home, Apple Homekit, Samsung SmartThings, etc.
To prevent 6+ flavours of smart lightbulbs working with 6+ different apps, a standard needed to be found.
When I first heard about the Matter standard I thought it made sense and decided to test it out. In January 2024 Arduino announced a partnership with SiLabs to produce a Matter enabled board. It uses the same chip as Sparkfun’s Thing Plus Matter – MGM240P – Consider me “on-board”. I bought the Sparkfun board.
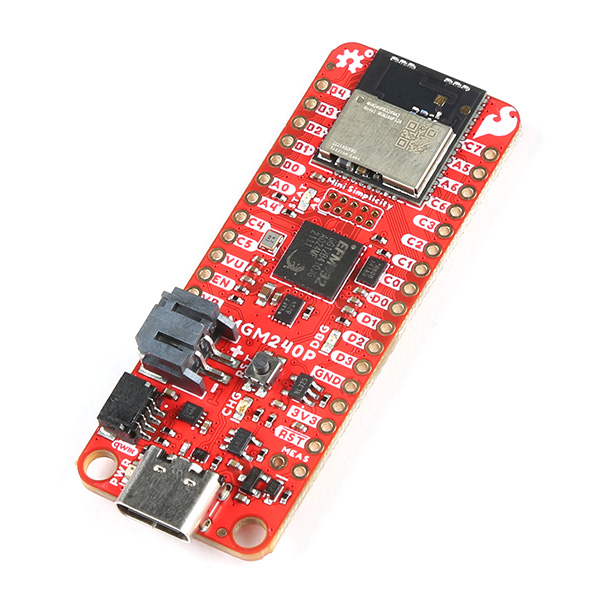
I <3 Sparkfun and their documentation and videos are excellent. However what followed was all new experiences for me, including using SiLabs IDE to Flash and program the device. What, no Arduino or MicroPython? (Turns out there is now an Arduino example.) I eventually kind-of figured out the SiLabs “Simplicy Studio 5” development environment. https://learn.sparkfun.com/tutorials/connecting-thing-plus-matter-to-google-nest-hub
My idea was that Matter was an open standard and works across home ecosystems. However what followed was Vendor IDs and Product IDs authentication, command line conjuring, and QR code scanning.
In the end my oringinal Google Home is not a Thread Border Router and not capable of the example. oof.
However the board is listed as being able to run CircuitPython.
https://circuitpython.org/board/sparkfun_thing_plus_matter_mgm240p/
Most of the time this involves clicking a button twice quickly and dragging over a .UF2 file. Not so on the MGM240P
This article helped me out https://community.silabs.com/s/share/a5U8Y000001a2QoUAI/introducing-circuitpython-support-for-silabs-xg24-boards?language=en_US
Back to SiLabs Simplicity Studio to install Simplicy Commander Tool, flash the .BIN.
And after all that, it still does not simply show as a mounted drive like almost all CircuitPython boards. It requires the PIP installed ampy to run .py programs.
As someone who usually feels quite comfortable with embedded systems, this felt confusing.
Looks like it will take some time for Matter development to be easier.
As for now…
Adafruit CircuitPython 9.0.3 on 2024-04-04; Sparkfun Thing Plus MGM240P with MGM240PB32VNA